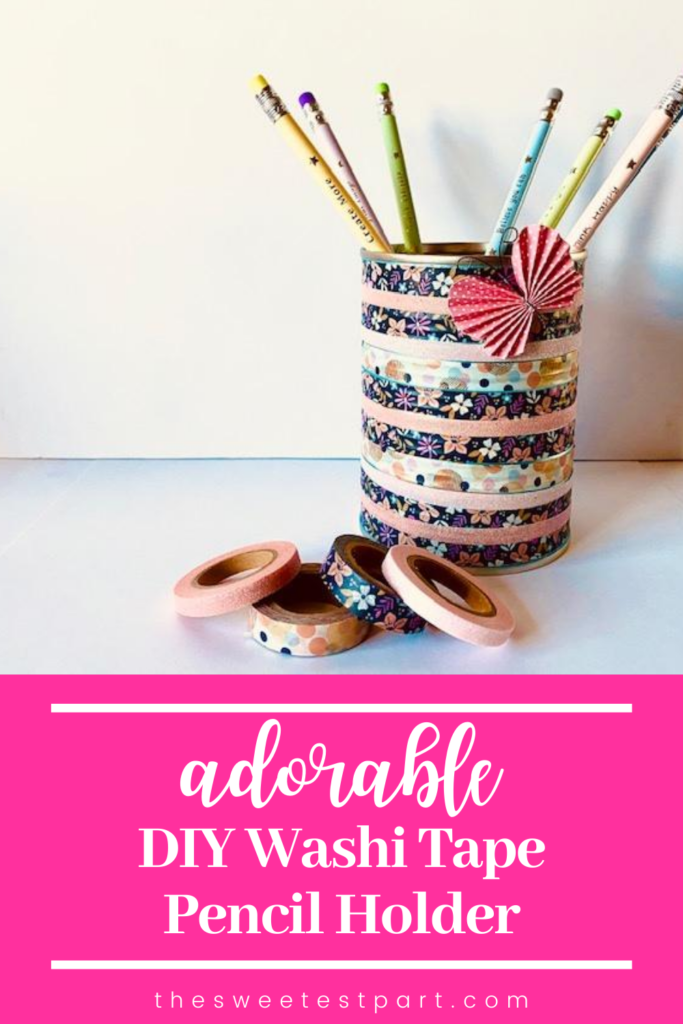
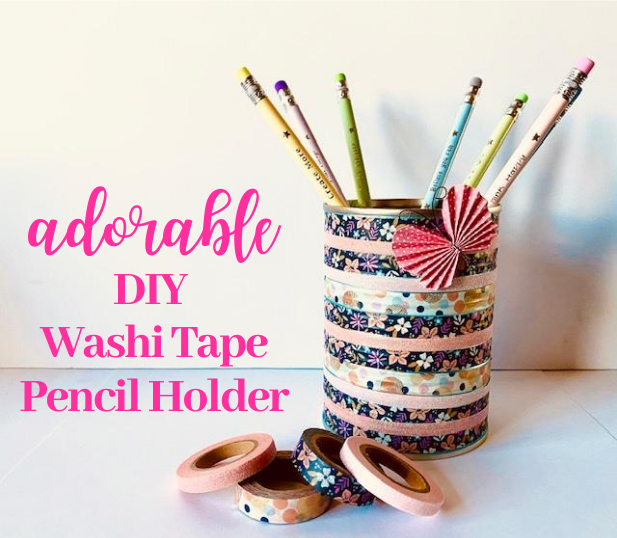
Fun DIY Washi Tape Pencil Holder
Looking for a fun back to school craft for your kids? Let them get crafty with this awesome DIY Washi tape pencil holder!
I kind of have a thing for craft supplies. I used to think it was just paper. A shopping trip to Hobby Lobby would end with all sorts of beautiful scrapbook paper, with no real plan on how to use them!
Now I realize that I am a sucker for all kinds of crafts supplies! And now I have a new love, WASHI TAPE!
Before I even knew how I would use it, I had to get my hands on some!
There are lots of great ideas for using washi tape, but if you have a child heading back to school, this DIY pencil holder will be a fun craft to get them ready for the new year & help them create a fun study space all their own!
Back to School Crafts For Kids: DIY Washi Tape Pencil Holder
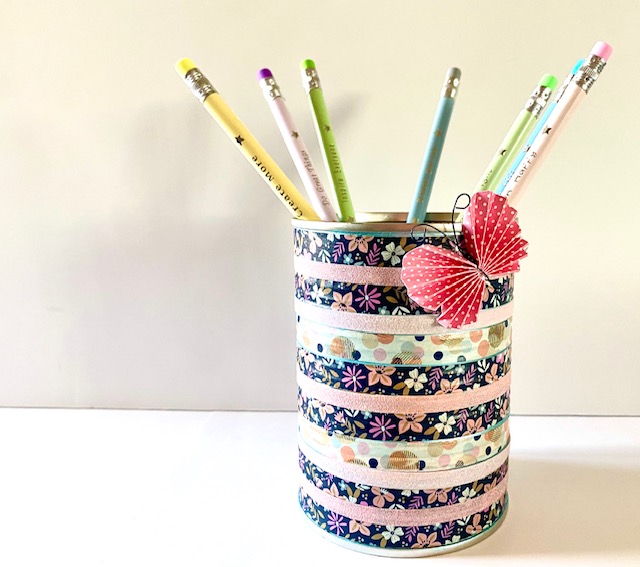
- empty metal can, preferably with a pull-off lid (it will have a smoother edge
- Washi tape, different widths & patterns, colors
- Paper embellishments for scrapbooking, optional
- Hot glue gun (if you are adding embellishments)
1. Remove the label from the can and wash it in warm soapy water. Be sure it is COMPLETELY dry.
I initially planned to paint my can and then add the washi tape. But as I continued adding the tape, I decided my DIY pencil holder looked better without any paint showing. (Tip: Most paint will peel off, so be sure your tape is where you want it to avoid pulling the tape off when adjusting the placement!).
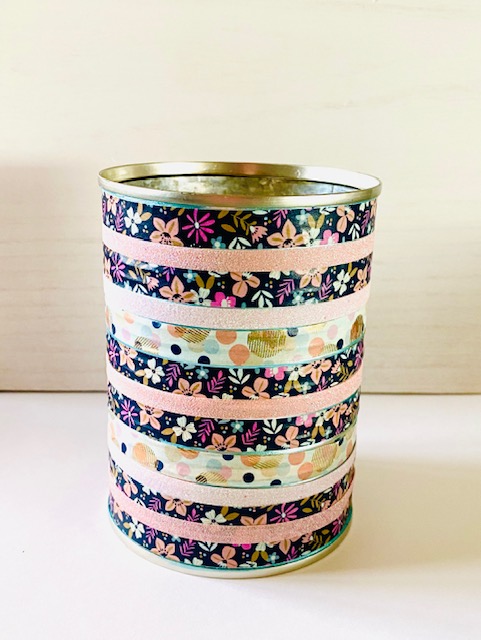
2. Start your tape in the same spot each time. Begin in the back where the label had been glued on.
I started with one style of tape at the top and bottom. (Tip: Not sure which patterns will look good together? Buy a set of 3 or 4 patterns that are sold together because they are made to complement each other!)
3. Use the grooves of the can to keep your washi tape nice and straight along your pencil holder.
4.. I added a cute thinner glitter washi tape between the patterns. I really like how it turned out, but that tape is thicker, so it was a little harder to get it to stick to the can.
5. When I was finished, I ran one strip of washi tape vertically along the end to help secure the other pieces (especially that finicky glitter tape).
6. Once you have your pencil holder covered completely (or as much as you want), you can finish it off with some embellishments. (I had some really sweet paper butterflies that I had purchased at Michaels a while back, so I added one to the top of my DIY pencil holder when I was done!)
Other Fun Ways to Use Washi Tape
- Let your kids decorate a few pencils for school with it!
- Decorate the outside of binders & notebooks with it!
- Cover clothespins with washi tape & hot glue a magnet to the back for fridge reminders.
- Cut a piece of card stock into 2 inches by 6 inches and cover with or make a design on. Punch a hole in the top & run a ribbon through and you have a cute DIY bookmark!
- Cover binder clips with washi tape
- Organize your phone chargers using washi tape!
- Take the labels off of small water bottles and decorate them with washi tape.
- Wrap the end of plastic utensils with washi tape for an inexpensive, adorable decoration!
I hope you and your kids have fun getting creative with this DIY pencil holder. And if you are looking for more fun back-to-school craft ideas, head over to this post! Want to use duct tape? Check out this fun bag that is also waterproof!