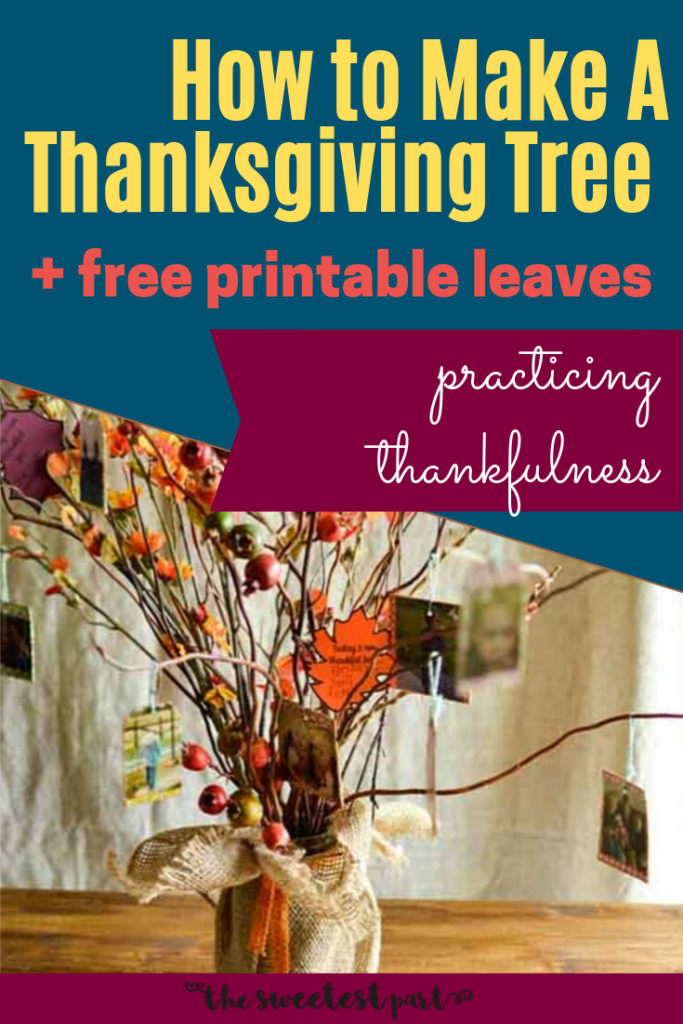
Teaching Our Kids To Be Thankful +Thanksgiving Tree Tutorial
I LOVE the holidays!!! From about the middle of September, I start getting excited about Thanksgiving! Thanksgiving, in September!?! Yep, that’s the first of the holidays that I truly enjoy! Maybe not so much when I was a child. However now, as an adult, I appreciate the warmth of family time and the emphasis on thankfulness & gratitude that happens during this special holiday! And I want to teach our kids to be thankful and appreciate all of the blessings that God has given us!

Even though I love the holidays, I can get totally stressed with all the busyness of it! I always go into the season with 100 things that I would like to do with my family. Things that will make memories, give us quality time together, and teach them important truths about God’s goodness to us. Then I blink, and it’s New Year’s Day, and all I remember is a whirl of garland and gift wrap!
But, what I have found, is that if something is truly important to me, I have to make an intentional effort to make it happen! But that doesn’t mean that I have to do all of those 100 things that I would like to do!
Making Time For Teaching Our Kids To Be Thankful
It just means that I have to make a plan and have everything ready so that when the time come, the follow thru is fairly simple. I can’t expect that in the middle of the craziness that I’m going to have time to cut out, stuff or glue together whatever activity that I want to do with my kids. Planning and preparation lead to success when trying to do a special activity with our kids (especially during a busy time like the holidays)!
Since teaching my kids to be thankful is important for me, I decided several years ago to make a thankfulness one of our yearly traditions. So I created a Thanksgiving tree that we love to put out each year.
Teaching Our Kids To Be Thankful Activity: Our Thanksgiving Tree
It’s a small tree, just branches, really. But we love it and have lovingly decorated it with photos of special times with our family. I have decoupaged pictures of our whole (even extended) family onto gift tags and decorated them with scrapbook paper and hung them onto the branches with beautiful ribbon.
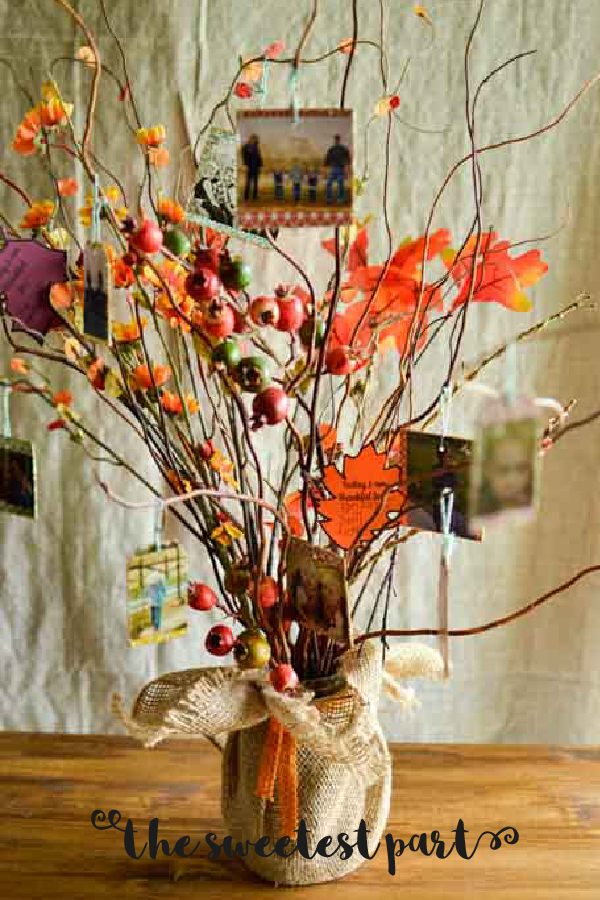
I really love looking at the ornaments with memories from when my children were young on each branch! This is a simple craft, but the tree alone ,hasn’t done the job of teaching our kids to be thankful.
This year, I want to really try to include my children in thinking of ways that they are thankful. (In truth, this was my intention last year, but remember what I was saying about planning?).
So, this year, I have made some printable leaves with the phrase “I am thankful for…”. I plan to let my kids fill in the blank with their own praises to hang on our Thanksgiving tree.
This can be done each night around the dinner table, at bedtime, once a week throughout the month of November, or anytime that fits into your family’s routine! Just keep a basket with cut out leaves and some colored pencils or pens on the table, next to your tree so that you can have it ready to go when you are!
Other Ways of Teaching Our Kids To Be Thankful
Sentence Prayers
My children still seem to be most comfortable with praying a memorized prayer. You know, “God is great, God is good”. And although sometimes I feel the need to push them to say something different, my husband has done such a great job of encouraging them to just be willing to pray, even if they aren’t ready to say it in their own words yet.

One way that we have been able to help them pray in their words, is to have sentence prayers. For sentence prayers, one parent starts the prayer. Then each child has an opportunity to make one request or say one thing that they are thankful for. After everyone is done, the parent closes the prayer. This can be a special, no pressure way to allow your kids to show thankfulness on their own terms.
Family Thankfulness Poster
Another way of collectively sharing your thankfulness is to make a Thanksgiving poster or banner. You can do this by getting butcher paper or a poster board and write across the top, “We are thankful for…”. Then allow your children to write what they are thankful for on the paper each night.
One great thing about making these activities ongoing throughout the month (or even the whole season?), is that your children will start to really notice things that happen throughout the day that they are thankful for!

Chain of Gratitude
We did this one year in our Sunday School class. First we cut construction paper into strips. Then we wrote something we were thankful for and linked the strips of paper together to make a chain. By the end of the month, our chain went all the way around the room! This is a great inexpensive and simple activity!
Gratitude Game
Check out this fun Gratitude Game by TeachBesideMe.com. This games uses colorful Pick Up Sticks to prompt your children to list different things that they are thankful. Another great & FUN ideas to get your children thinking about being more thankful!
Lead By Example
One of the things that is often the hardest for us to do as parents, is to lead by example! We want to teach our children to be thankful! However, if we aren’t modeling gratitude in our own lives, it won’t come easy for them either!

So, join in with your children’s activities! Write on the Thanksgiving tree leaves, add a praise to the Thankful poster, or the chain of gratitude! You may find that as the month goes on, that you are recognizing God’s blessing more than you had before!
And like many things in our lives as parents, we often learn as much from our children as they do from us!
In Psalm 22:3 it says,
“But thou art holy, O thou that inhabitest the praises of Israel.”
So God loves to come in and be close to us when we praise him! Isn’t that wonderful? And what better habit to teach our children, than to first recognize where ALL of our blessings come from! Then, to put into words how thankful we are for each of them!!!
Thanksgiving Tree Tutorial
I made my own Thanksgiving tree out of branches that I bought at Hobby Lobby. Over time, I have added some branches with berries, and other decorative branches (some with small flowers).
I place my branches in a glass jar filled with marbles and then I wrap the jar with burlap to hide the rocks.
After I make my ornaments and allow them to dry, I place them around my Thanksgiving tree for decoration!
- Gather cardboard tags, mod podge, small photos of family, scrapbook paper, wax paper, paint brush or foam brush, scissors, pencils, fine glitter, ribbon or twine.
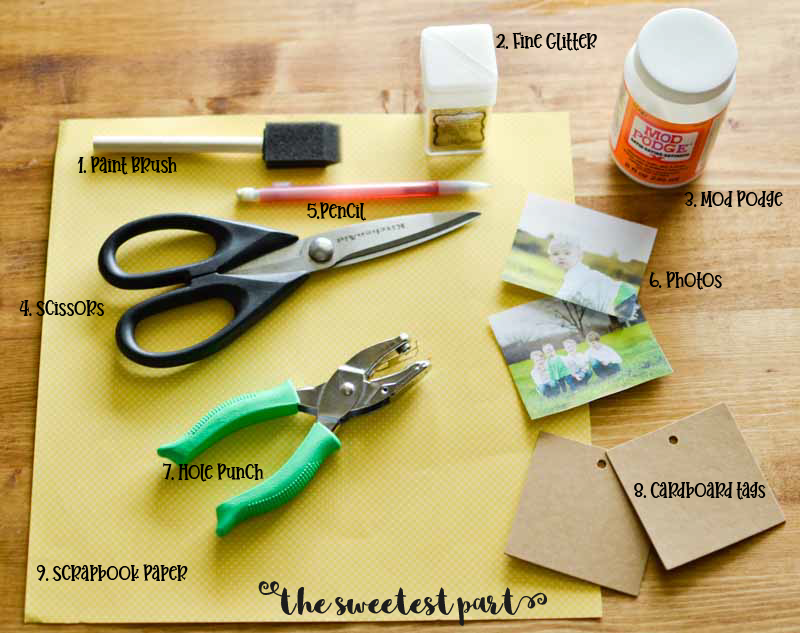
- I like to make a color copy of my photos because a thinner paper is easier to mod podge onto the cardboard. This is optional, but the mod podge could possibly damage your photo.
- Make sure your photo is small enough to fit on the carboard tag that you have chosen to use. (This is another advantage of color copying your photos, you can scale them down to fit your tags).
- Line your gift tag up to the part of your photo you want to show. (You can hold you picture up to the light with the tag behind it to check for placement.) Then place the photo face down onto a table with the cardboard tag still behind it and trace around the tag.
- Flip your scrapbook paper face down and trace your tag on it also. Also make a mark for the hole so you can either punch or cut a hole in your paper & photo to you will have a place for your ribbon when your ornament is complete!
- Cut out the photo and the scrapbook paper along your marks, try to cut on the inside of the marks. It is easier to work with a photo or paper that is too small rather than too big.
- Once your photo and paper are cut and you have made sure they fit well, apply a thin layer of mod podge to the cardboard. Then carefully place the photo on it and smooth the full area. Once the photo is smooth you will apply a thin layer of mod podge to the top of the photo as well. This seals the photo onto your cardboard tag/ornament.
- Allow the tag to lay on the wax paper and dry for about 10 minutes or until dry to the touch. Then turn it over and repeat the process with the scrapbook paper.
- Once both sides are done and dry, paint (or dip) the edges of the tag in mod podge and then dip in fine glitter and place back on the wax paper to dry.
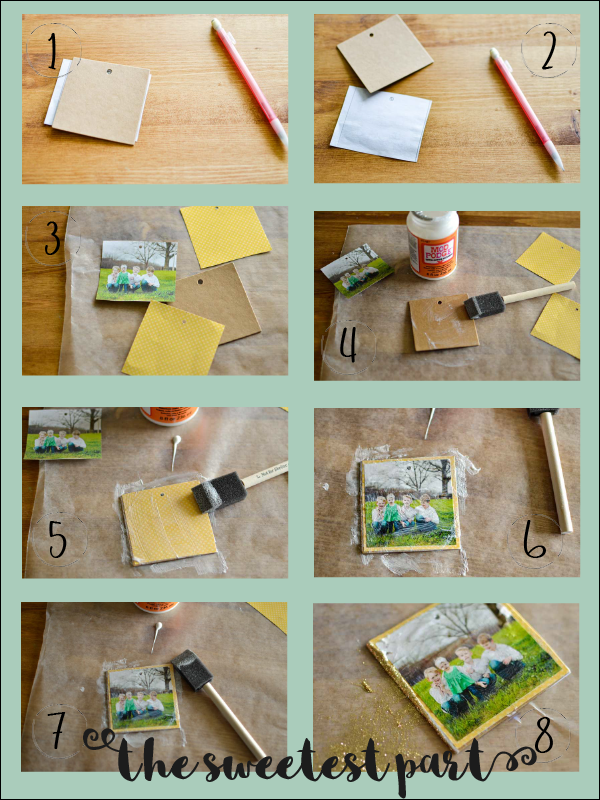
Once the tags and glitter are completely dry (approximately 30 minute), you may add your ribbon and hand your Thanksgiving tree oranments!
Tip!
I would suggest having the leaves cut out with your ribbon or twine placed so they are ready for hanging. This will decrease the chances that they won’t ever get placed on your tree!
Enjoy this new tradition & add to your memories, and thanks year after year!
Want to save this post for later? Please pin this to your favorite Pinterest Board, and while you are at it, follow me on Pinterest!